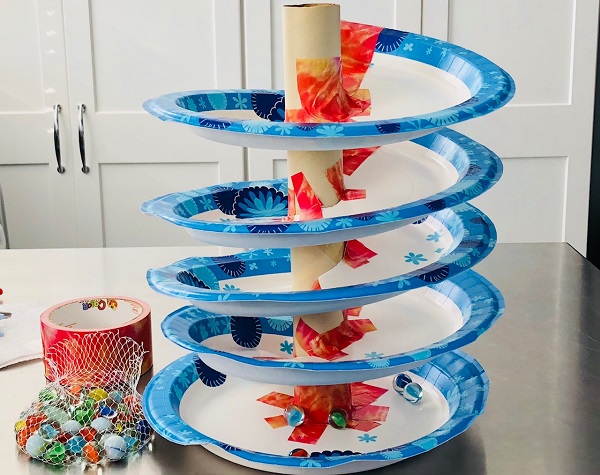
Maker Monday: kids can create their own super-fun marble run
Here’s a new way to play with marbles and experiment with gravity. This week’s Maker Monday shows how to create a marble run from a few simple supplies, including paper plates. This STEM construction project will challenge kids’ engineering skills and help them learn how speed changes with the degree of the slope.
Tip: Use paper plates with a deep rim (instead of very flat plates) to keep the marbles from slipping off the marble run and rolling across the room.
As with all Maker Monday projects, the supplies you’ll need are things you may already have around the house or you can buy inexpensively at a dollar store or craft store. And it’s always helpful to read the instructions all the way through before beginning.
A note to kid makers: Please work with a parent or caregiver on Maker Monday project and always be very careful when using tools of any kind.
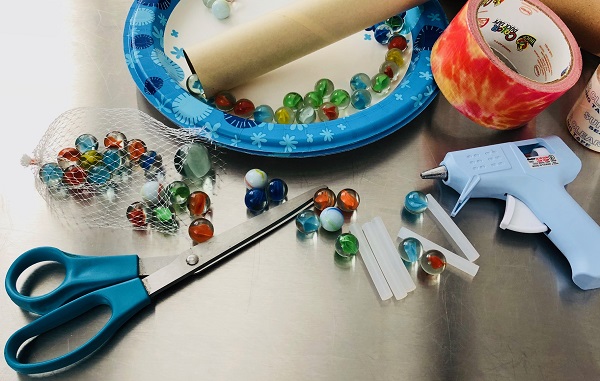
Maker Monday materials you’ll need:
- a cardboard tube (an empty paper towel tube, small mailing tube or empty wrapping paper tube works great)
- paper plates with a high rim (colorful ones make this more fun — if your plates are plain, color them with markers!)
- scissors
- tape (duct tape or masking tape both work great, though you could also use a glue gun)
- marbles
STEP 1: Decide how large your run will be. If your cardboard tube is about 12-inches long, you will use five plates. If you’re ambitious enough for a taller run (if you’re using a long wrapping paper tube, for example), you’ll need to use more plates.
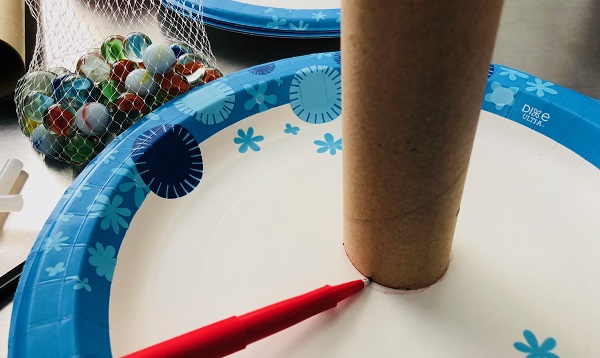
STEP 2: Trace the end of your tube onto the center of each plate.
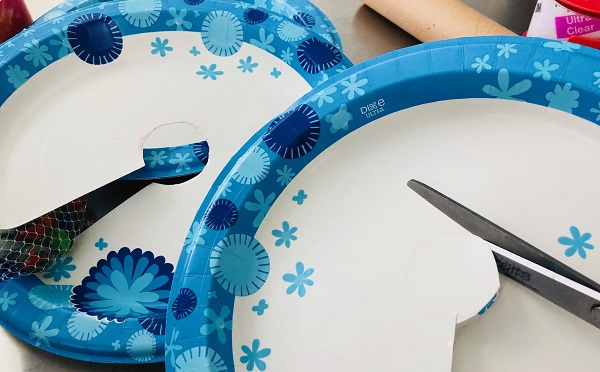
STEP 3: Cut a straight line from the edge of the plate into the center, then cut out the circle that you traced on each plate. (See above.)
STEP 4: Stack the plates together with the cut edges at the same place. Then slide the plates onto the cardboard tube.
STEP 5: Begin to tape the plates together, attaching one of the cut ends of the top plate to the cut edge of the plate below it. You are making one continuous ramp, like in a parking garage. (Note: We tried using packing tape but found that duct tape worked best.)
STEP 6: Continue taping the cut edge of each plate to the plate below it, creating a spiral track. Then place an uncut plate at the bottom and attached the last plate’s cut edge to that uncut plate at the bottom. This will catch the marbles.
Attaching the spiral track to the tube can be a little tricky. You might need an extra pair of hands to put it together, so this can be a great project for an adult and a child to do together. You can also try taping all your plates together first, and then sliding them into the tube and taping them.
Now you’re ready to race! Start by sliding one or two marbles down the run and see how fast they go. You can also experiment with other objects besides marbles, like ping pong balls or Matchbox cars, and see what happens.
For more Maker Monday projects and other fun stuff for kids, visit the Kidsburgh Activities page.
