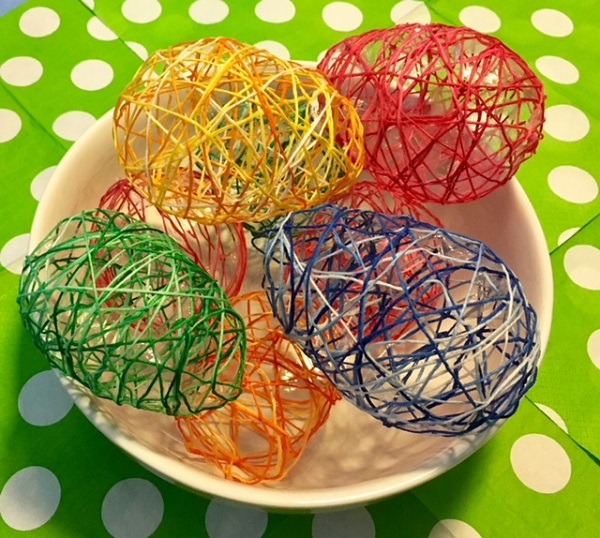
Maker Monday: String Eggs
With the approach of Easter, we thought you’d like a second look at this popular Maker Monday project, first published March 5, 2018. It’s a cool one that we love!
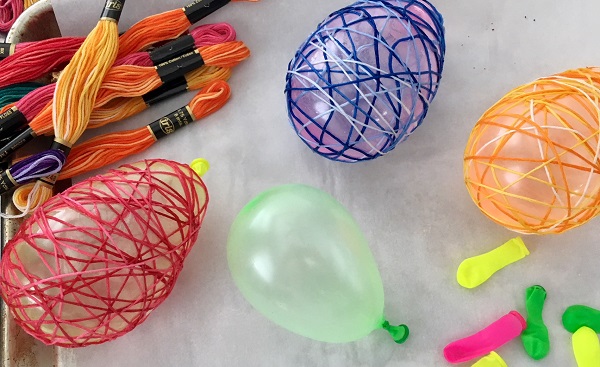
The art of String Eggs has been around since Grandma was in kindergarten. Back in the day, crafty kids would use liquid starch or sugar water to create these elegant globes built upon balloons. For this week’s Maker Monday project, our String Eggs use school glue, like Elmer’s, to attach embroidery thread in a web-like pattern around balloons.
We used tiny water balloons for our eggs, but you can be more ambitious with larger balloons or blow up balloons to different sizes to create a beautiful display. Smaller balloons might be best for little hands.
Kids can choose embroidery thread in a variety of colors, opting for pastels, brights or shimmering metallics, depending on your taste.
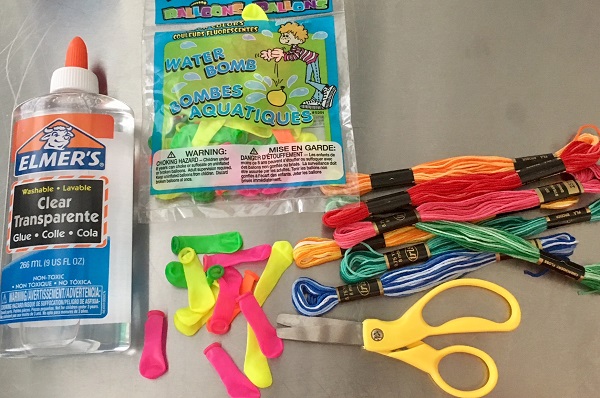
Supplies:
Balloons
Embroidery thread
Schools glue, white or transparent (the white will dry clear)
Scissors
Parchment paper or waxed paper
Blow up balloons to the desired size and tie off. Choose your embroidery thread color and unwind the skein. We found it best to cut the thread before starting into about yard lengths and lay each length separately within easy reach to prevent tangles. We learned the hard way that once your fingers are sticky with glue, it’s very difficult to untangle the thread!
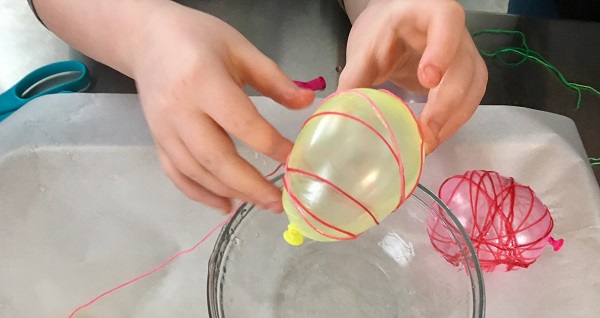
Pour an inch or so of glue into a bowl. Begin dipping fingers in the glue and coat the thread as you go, winding the thread around a balloon. As you add new lengths of thread, dab the end to another string to prevent the end from showing. Continue to dip fingers to add more glue as you go. You want to be sure all of the thread is coated with glue.
As the balloons are covered with thread webbing, set aside on parchment paper or waxed paper to dry overnight.
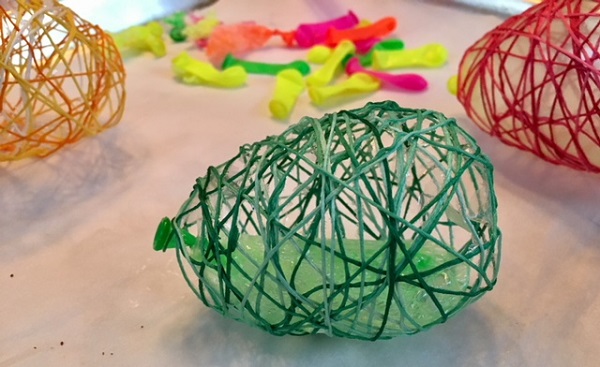
Once the string is dry completely, it’s time for kids to pierce each balloon with a tack, pin or needle. Rather than a “pop,” the balloon slowly begins a crackling noise like cracking ice or Rice Krispies as it gradually pulls away from the string and shrinks. Remove the shriveled balloon from inside the egg, using tweezers if necessary. You might be left with a bit of dried glue between the webbing, which can be picked out with little fingers or tweezers.
Your delicate String Eggs are ready to display. They will look pretty arranged in a bowl or hung on ribbons as a reminder of the arrival of spring.
For more Maker Monday projects and other fun stuff for kids, visit the Kidsburgh Activities page.
